 With the advent of desktop film scanners back in the mid-’90s a lot of photographers took on the task of scanning their own film instead of outsourcing the job to a drum scanning service. The scans coming from these scanners were quite serviceable for web work and some limited print- mostly small, short-run inkjet- purposes. As low-end flat-bed scanners improve, many studio and small lab based systems have improved to the point of almost replacing the fluid-mount drum scan.
Almost.
There are a few things about fluid mounting that simply take you head-and-shoulders above what you can get without it. Probably most importantly, as a general rule any scanner that supports fluid mounting properly is starting off with an ultra-high resolution system, and an ultra-high DMax (or density) capability. Even without fluid mount, you’re using better hardware. It should be better- the cost is in the tens-of-thousands of dollars for these systems, and, as always in imaging technology, “…you get what you pay for.” has never been a truer statement.
One of the interesting things that happens when you use a fluid-mount system is that the film’s density becomes more readable by any scanner. Back when flatbed scanners were starting to become serious tools, more than a few people I know started using drum-scanning fluid (then, basically straight mineral oil) on their flatbed scanners… they got a vast improvement in the apparent DMax. A few of them also destroyed their scanners with oil dripping into the guts… ultimately a pretty expensive “hack”.
One of the most significant reasons we use fluid, however, centers around the actual physical condition and properties of the film itself.
There are a few things you’re wrestling with when you use a scanner for film. The first issue centers around the surfaces where the film touches  the glass platen. Every surface you add to the equation introduced the possibility of dust and scratches- things that will be picked up by the scanner. You also have to worry about Newton rings- a natural phenomenon that happens whenever two glossy surfaces come in contact, resulting in a prism effect in concentric circles. The common method to overcome this is to use an “anti-Newton” glass- a method that also softens the scan slightly. Using a fluid-mount system eliminates virtually all of these problems. The fluid prevents the formation of Newton rings. It also literally fills in scratches and surface imperfections. If dust is present, it will, of course, scan- but there’s a significant
  amount less dust with fluid because there’s no static attracting it to the surface of the film or the glass.
Most film brought to us is not particularly, well, recent. Often we’re scanning film that’s been in an archive, most of it thankfully has been stored properly and is in pretty good shape. Some of it, however, may have started out in the notorious “shoebox” filing system we’ve all been guilty of, and even film coming directly from the lab has a decent chance of having small scratches and embedded dust present. When you’re scanning at a true optical resolution of 5000 dpi and higher, you’re going to see it.
Just for example, here is a scan we did on our iQsmart of a transparency without fluid mounting. (The visible Guide is there in Photoshop so we could locate the spot accurately, and we’re viewing this from a 2500dpi scan at 100%.)
In particular, note the small scratch on the right-hand side of the selection. Now look at what you get with a fluid mount:
Same area, we literally just fluid-mounted the chrome without moving it.
As you can see, and everything else aside, fluid mounting saves you an enormous pile of time when you’re retouching flaws in the image, preparing it for printing. The older, more abused, dirty or damaged a piece of film is, the more you need to use fluid mounting. On a chrome in good condition, though, you often eliminate the need to do any spotting entirely.
Fluid mounting started out using mineral oil- it was relatively easy to clean off the film after the scan, though the common practice was still to re-wash the film to remove any residue. Today we’re using fluids that are much safer for the film. They’re more volatile- they evaporate quickly, and don’t leave reside- as well as being less corrosive to delicate emulsions. For example, our LUMINA Optical Super Scanning Fluids are what we prefer for the safest handling of the film, and fast, easy cleanup.
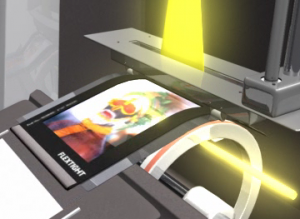
Hasselblad continues to produce the Flexframe scanners using what they call “Virtual Drum” scanning  technology. This uses no glass- the film is held in a frame that is tracked in a slight arc as it scans, allowing the lens to focus precisely at the film plane without introducing glass surfaces and associated dust and Newton rings. They use the highest level of optics and sensors giving you some of the highest density and resolution- and it’s a great idea from an engineering standpoint. But… because you’re not using fluid, you’re stuck with all the surface imperfections on the material. Not so great from a retouching standpoint.
You’re also seeing some offerings of mid- to low-priced scanners with added fluid mount capabilities. Unfortunately, they’re not really built for fluid, more sort-of adapted for fluid, and we’ve seen and heard of a few getting damaged by leaking oil… in addition, they’re starting out with less than optimum hardware, generally in the optics. In this price point be very wary of specification claims, in particular for resolution. In some specific cases, you have low-end optics, but with very high optical resolution. Unfortunately, sheer resolution isn’t the last word in lens design- contrast and clarity play a big role, and that kind of performance costs money. You simply can’t compare the scans from a $700 scanner to those of scanners costing over $20,000- period.
In the final analysis, we’re back to the beginning of the story. The desktop scanners are great for what they’re meant to do, but, as with so many things, if you’re starting with a better scan using the right methods, you’re going to end up with a better print- after a lot less work.

