ParrotTalk

October 29, 2010

Printing With “No Color Management” with the Epson 11880 (PS4 and Leopard)

Filed under: Uncategorized — admin @ 1:16 pm

Printing a profiling target with “No Color Management” in Photoshop, and with the printer drivers’ Color Management settings turned OFF is the keystone of profiling a printer.  You need to start with a target file with no tagged RGB profile, and print it just like it is.  Seems simple enough, doesn’t it?

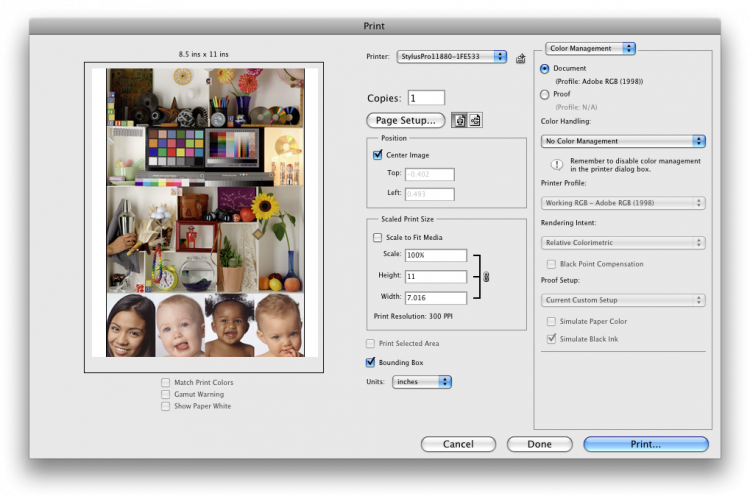
Enter Adobe’s Photoshop CS4, and the Print window- here’s what it looks like, and how it needs to be set to assure you’re not touching the document:

And here’s how you need to set the Epson drivers once you hit Print:

All very standard stuff…  well, except the Epson 11880, and maybe other Epson -880 series printers won’t print.  It will spool the job, maybe hum up, and then spit out a blank page without printing.  Sweet.  So we tried a workaround.  We set the Photoshop menu to “Printer Manages Color”, and then set the driver, again, to “Off- No Color Management”,  figuring it would get to the same place- an un-color managed document.

Well, I’m here to tell you, it doesn’t.

I just got out from under about a week of wrestling with what we thought was a problem somewhere in our ProfileMaker and/or Monaco profiling workflow with the Spectrolino- the profiles were nowhere near as tight as we’re used to- and were additionally baffled by the fact that our i1 Match system with the i1 Pro was building a bulletproof profile.  It wasn’t until the guys at X-Rite (…yes, occasionally we DO have to ask for help from Support!), notably Bruce Wright, said this:


“ProfileMaker and i1Match use the same color math, so normally if you get good results with one, you should get good results with the other. The significant difference is that the targets you print from i1Match come directly from i1Match and then pass through your printer driver. The targets you print for use with Monaco Profiler or PM5, might be getting printed via a program such as Photoshop. This is one possible area that could influence the printing of the charts, as there have been changes in the Mac OS and how it works with Adobe Creative Suite programs in both Leopard and Snow Leopard systems.”

…and that got me to thinking.  I looked yet another time at my print “path”, and saw that “No Color Management” selection once again.  I read a little more.  I then opened up the target in my old CS2 version and printed it the old fashioned way- remember “Print with Preview”?  The new target was visibly different, and when I built the profile and printed with it, I got the same solid print I’ve come to expect from the system…  obviously my workaround didn’t work.  Somehow, some colors were being pushed around.

As it turns out, this Epson driver / Mac OS / Adobe issue really doesn’t get claimed by any of the three responsible companies, but it is a known issue.  My leaning is towards saying it’s probably an Adobe issue, but it really doesn’t matter.  What I have, so far, from someone pretty much in the Adobe camp is that the issue is “fixed in CS5″.  Nice.

The interesting lesson learned is again from Bruce:

“We get this question being asked in all kinds of different ways. But at the end of the day, if a target doesn’t get printed without color management turned off in the printer driver, then using the profile in any version of CS will not give correct results.”

Word.

This is basically the same advice when you’re told to check the cables and connections…  start with the absolute basics and work up the ladder.  In this case, and in so many cases of printer color problems, the first, obvious step is to make sure the colors are managed, or not, where and when you want them managed.

It’s simple enough advice, I just wonder why I have to be reminded of it so often…
October 12, 2010

Scanning Glass Plates

Filed under: Uncategorized — admin @ 4:27 pm

Glass was the natural substrate to use for a photographic negative back in the early days of photography.  Every photo student has heard the stories of going “on-location” with a glass-plate camera, most likely in the context of photographers like Matthew Brady photographing the Civil War.  The process involved disappearing inside a light-proof tent to coat the glass with a light-sensitive emulsion, then inserting the plate in the camera to then expose.

We’ve worked on several projects involving glass plates, including some plates that hadn’t stood up too well to the ravages of time.  One plate was broken into more than a few pieces- then taped together.  It was an early shot taken of the Boston Braves- the Boston baseball team that eventually became the Red Sox.  Unfortunately one of the cracks went right through the batter, who was caught mid-swing.  Photoshop, though, made it easy to cut and paste the negative back together and clean up the edges.  By the time we were done with it, you’d never have known it was anything but the original!

The shot above was a yard-sale find.  It looked like an interesting image that begged the background story- who are these people, where is this house?  Perhaps we can find out more…

This plate was part of a project we did in 2009 for the Billerica Historical Society, the Billerica Union Hall.

Each project demands a slightly different approach.  Like any restoration, the degree to which you “fix” the image depends on how much you’re trying to reproduce the image as it remains today, or reproducing it as it was originally.  It’s more about the way the images will be used, the story you’re trying to tell with them.  …and, in spite of all the power of Photoshop, in many cases we’re pushing our top-end equipment to the limit to dig through the layers of Time, and thick, uneven emulsions to find the true image.

Still, in spite of all the technology and the process, sometimes you have to step back and marvel at these unique, historic, yet timeless images.   It’s what makes our work at Parrot so much fun!

October 1, 2010

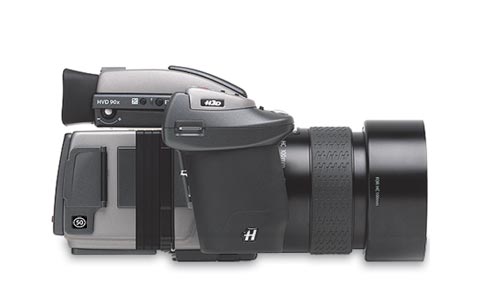
Parrot adds High-Res Multi-shot Capture!

Filed under: Uncategorized — admin @ 10:43 am

We’ve been known for years for our amazing Cruse scans of paintings and rare, delicate artifacts – even pinball tables – but never before have we had the capability to shoot your complete collections, until now. With the addition of our Hasselblad Multi-shot capture system and a re-tool of our Betterlight cameras, we can now cover every piece of a collection, exhibit or catalog under one roof.  We’ve worked with some of the finest and most cherished flat artifacts for decades now, including the remarkable Giza Pyramids project,  but our experience isn’t limited to just that- our team has years of experience shooting studio photography, artwork, sculpture and jewelry for some of the most demanding clients.

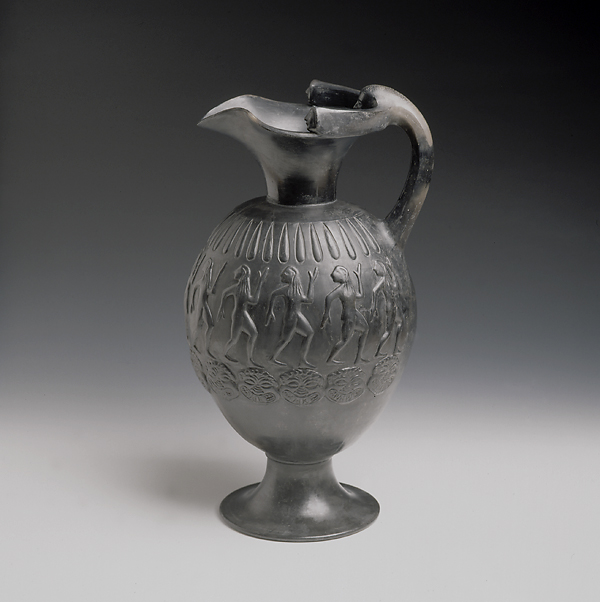
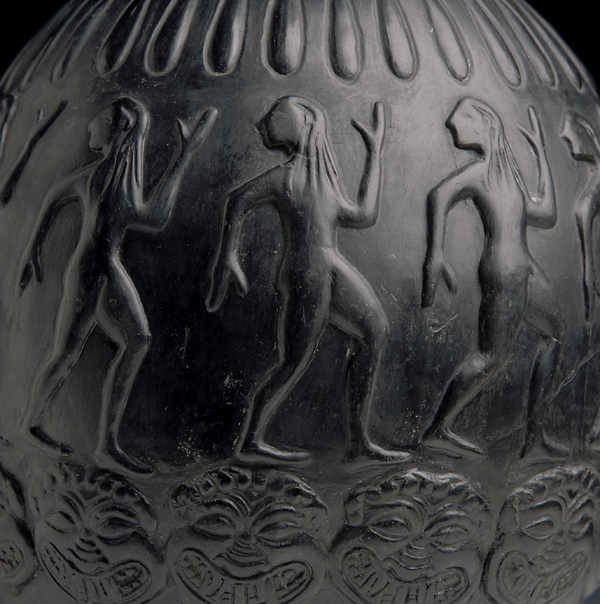
The vase shown here is a exquisite piece shot for the Fitchburg Art Museum from our staff portfolios.  It’s only a small example of the kind of work we can do, as well as a demonstration of what a complete understanding of light and color control can do to create a photograph that is true to the beauty, delicacy and scale of the original artifact.

In many cases you only have one opportunity to have a collection photographed.  It’s crucial that the images represent the originals, and are in a form that represents a true visual archive.  Parrot understands this, and through our work in photography, color management and fine art reproduction, and now with our additional tools, we can cover everything you need in one comprehensive process.

Don’t hesitate to give us a shout for more information: info@parrotcolor.com  …and check back, we’re planning an Open Studio to show off our new gear in the coming months!

Powered by WordPress