ParrotTalk

October 26, 2011

Fine Art Reproduction: How to Do It Right

Filed under: Uncategorized — admin @ 9:36 am

Let’s assume we’re in agreement- all this time we’ve been doing it wrong.  How do we do it right?  Let’s do two things to start out.  Let’s set some goals, and let’s break this down into two parts: viewing the painting or print, and making the capture.

Viewing the Art

The lighting used for viewing the original painting, or the final reproduction, is probably the facet of the process that we have the least control over.  Once the print leaves our hands (or, for that matter, the painting leaves the hands of the artist) we really don’t have much to say about how it is displayed or lit.  Museums and galleries have some very tough challenges lighting work in a practical way.  As we’ve seen, this can be critical in how the print is perceived and interpreted.  There are, however, a few things we can do to establish attainable goals.  Simply, we can reproduce the painting as faithfully as possible, matching the color and contrast to the best of our capabilities and within the limits of our equipment.

One of the keys to achieving that is to view, and match, the original paintings and the proof prints under lighting that is as close to the artist’s studio as possible.  If the original was created in a North-light studio we’d prefer to evaluate our prints with lighting that comes as close as possible to the quality and wavelength of North light.  Likewise, if the artist works with halogen spots trained on the work, we should view the prints with light that is the same- gallery-style halogen spots.  The reasoning behind this is that every pigment or dye reflects light in a characteristic way.  Paint will look slightly different than our printer’s ink under quartz lighting and North daylight.  It may be dramatic, or subtle, but to get as close as possible to experiencing the vision of the artist, you need to view and match your final print under the same light that the artist used, with the original work lit identically. Only then can you really claim the print is faithful to the original.

Lighting and Capturing the Original

Let’s start with the most difficult goal.  Let’s think about how we’d light and capture the painting as the artist saw it.  The key to this is to recreate the light in the artist’s studio, down to the last detail.  Bear with me…  this is far from practical, but it’s a good exercise in understanding what the challenges are.

We would have to map out the location and size of the windows in the artist’s studio, and recreate them in the photo studio.  This includes size, distance from the painting, height, angle…  and would mean we’d either have to create light sources from daylight-balanced continuous, or strobe light sources.  Remember, the wavelength, or color, of the light source is critically important to assure we’re reflecting the colors of the original correctly. The background walls are equally important.  In Rembrandt’s studio we saw background walls with a warm tone.  This will effect our “fill” light- the light that illuminates the shadows in the painting, such as under the brush strokes.  The “main” light provides our primary color balance and illumination.  The “fill” light provides the background light, illuminating (or contaminating, if you will) the areas not affected by the main light.

In essence, we’d have to build a complete “set”, like a movie or stage, of the artist’s studio with our artificial light.

Suppose, for a minute, that we could simply bring our gear into the artist’s studio and photograph it with the very light the artist used.  This is certainly possible, but there’s one technical issue- the intensity of light in a North-light studio.  Although sufficient for painting, the level of light a North-light studio is at the very lowest levels necessary for making a good camera exposure.  This affects everything from color mapping to resolution.  The more we have to amplify the sensitivity of a digital camera, the less we get in terms of resolution and true color fidelity.  The actual studio is simply not bright enough.

So let’s scale back our goals a little, and try to simply get closer to what the artist saw than the standard copy practices.  We are looking for soft side and top-lighting with an open shadow.  Again, we can do this with a very large bank of strobes or continuous daylight balanced lights with diffuser panels (such as soft boxes), approaching the size and position of the original studio.  They have to be a fairly good distance from the painting to assure even coverage of the work.  If they’re too close, you’ll see variation in the light intensity from one side or another, or from top to bottom.  When you move the lights further away you compensate for how fast the intensity drops off over the distance from the closest part of the painting to the furthest.  (For more explanation of this, see this link on the Inverse Square Law.)  The rub is that, again due to the Inverse Square Law, as you move the lights further away, the intensity drops dramatically.  To use large banks of lights at the same distance as the original windows you’re going to have to pump huge amounts of power into those lights.

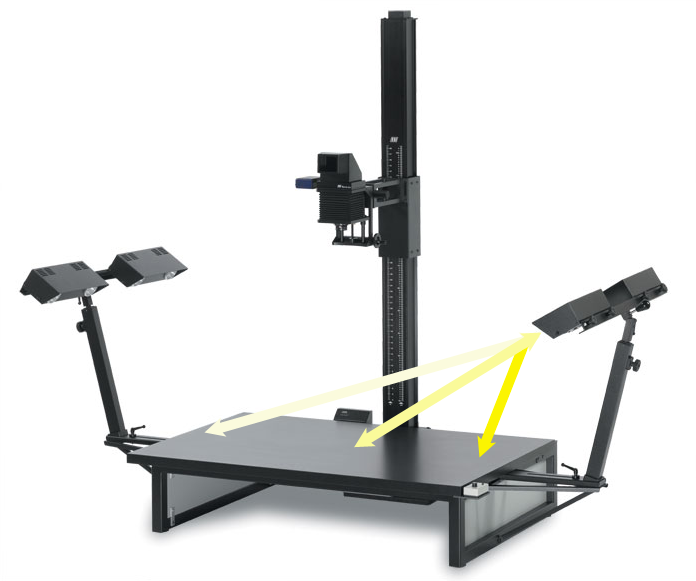
Or, you could use the Cruse Synchron capture system.  Because the Cruse system uses banks of daylight balanced florescent bulbs, the spectrum of the light source is as close as possible to the North-light studio.  Because it’s an inherently soft light source, it allows us to reproduce the softness of the light in the studio.  Because we can control the light direction and intensity, we can accurately simulate the light quality from a variety of studio environments.  …all at the push of a button.

Once again…  the secret of the Cruse?  It’s the lighting.
October 25, 2011

Fine Art Reproduction: The Importance of Viewing Light

We hinted in our previous post about the traditional “North light studio”, let’s look at that a little deeper.  The “North light studio” really holds the key to understanding the vision of the artist, seeing the work as the artist saw it, and interpreting the work as the artist intended it. As with any printer’s craft, the viewing light chosen for evaluating the print is of critical importance.

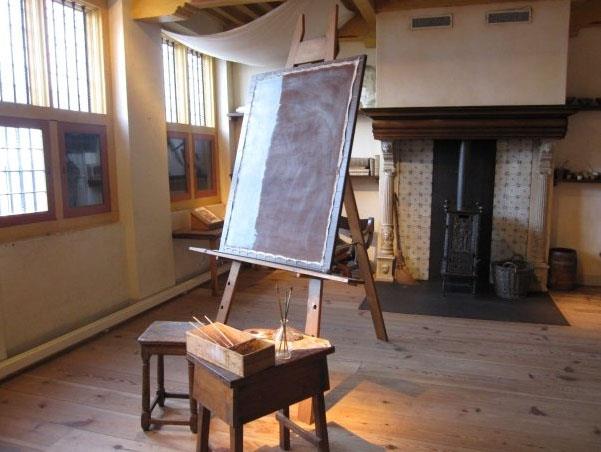
Here’s a modern-day photograph of none other than Rembrandt van Rijn.  Rembrandt worked in the mid-1600s, far before any modern lighting was even conceived.

What’s particularly interesting about this photograph is that the curators have obviously added track lighting to the room, shown as pools of warm light on the easel and some of the points of interest.  This serves our discussion really well, because by comparing the color and quality of the artificial lights and the window and skylights, we’re getting a pretty good idea of the differences.

You can see, quite clearly here, that the face of the painting has a distinct blue, or cool, cast.  This cool cast is very characteristic of light from the northern sky, since there’s no direct sunlight (which is significantly warmer) and can even shift to an even cooler cast if the sky in the North is a clear, blue sky.  What we sometimes see, when the artist’s studio has trees nearby, is the addition of a green cast from the light filtering through the leaves.  This makes a profound difference in the way a painting is perceived.

Here’s a photograph of one of Rembrandts paintings, Paul the Apostle in Meditation c. 1630, as it’s traditionally shown:

It has an overall amber cast, which would be amplified if lit under typical museum or gallery track lighting.  You light something with a warm light source, it tends to reflect that same spectrum at the expense of other colors.  Here’s where it get’s interesting.  In this painting the subject seems to almost melt into his environment, since there’s very little tonal or color difference.  Now look at it as Rembrandt may have seen it:

It’s a different feel.  The subject is now in the environment, no longer an intimate part of it, as a result of the cyan and blue tones in the background walls and shadows.   Admittedly, we’re making this change by adjusting the file to illustrate the point, but the validity of the point remains.  Depending on the viewing light, a painting or photograph can reflect different color spectrum response.  It can look different.  It’s crucially important in understanding the artist’s intention to view the painting as the artist saw it.

Is this important?  In the world of Art History, it’s profoundly important.  In an age where we can research, restore and recreate work as it appeared when it was created, new perspectives on the past accepted interpretations of work is changing how we understand the artist, and the time in which the artist worked.  And to coin a phrase, in the world of Art History, “wars have been fought over less…”

-Ted Dillard

October 24, 2011

Fine Art Reproduction: The Importance of Lighting Quality

Filed under: Uncategorized — Tags: , , , , — admin @ 11:03 am

Everything you’ve been told about how to light paintings is wrong.

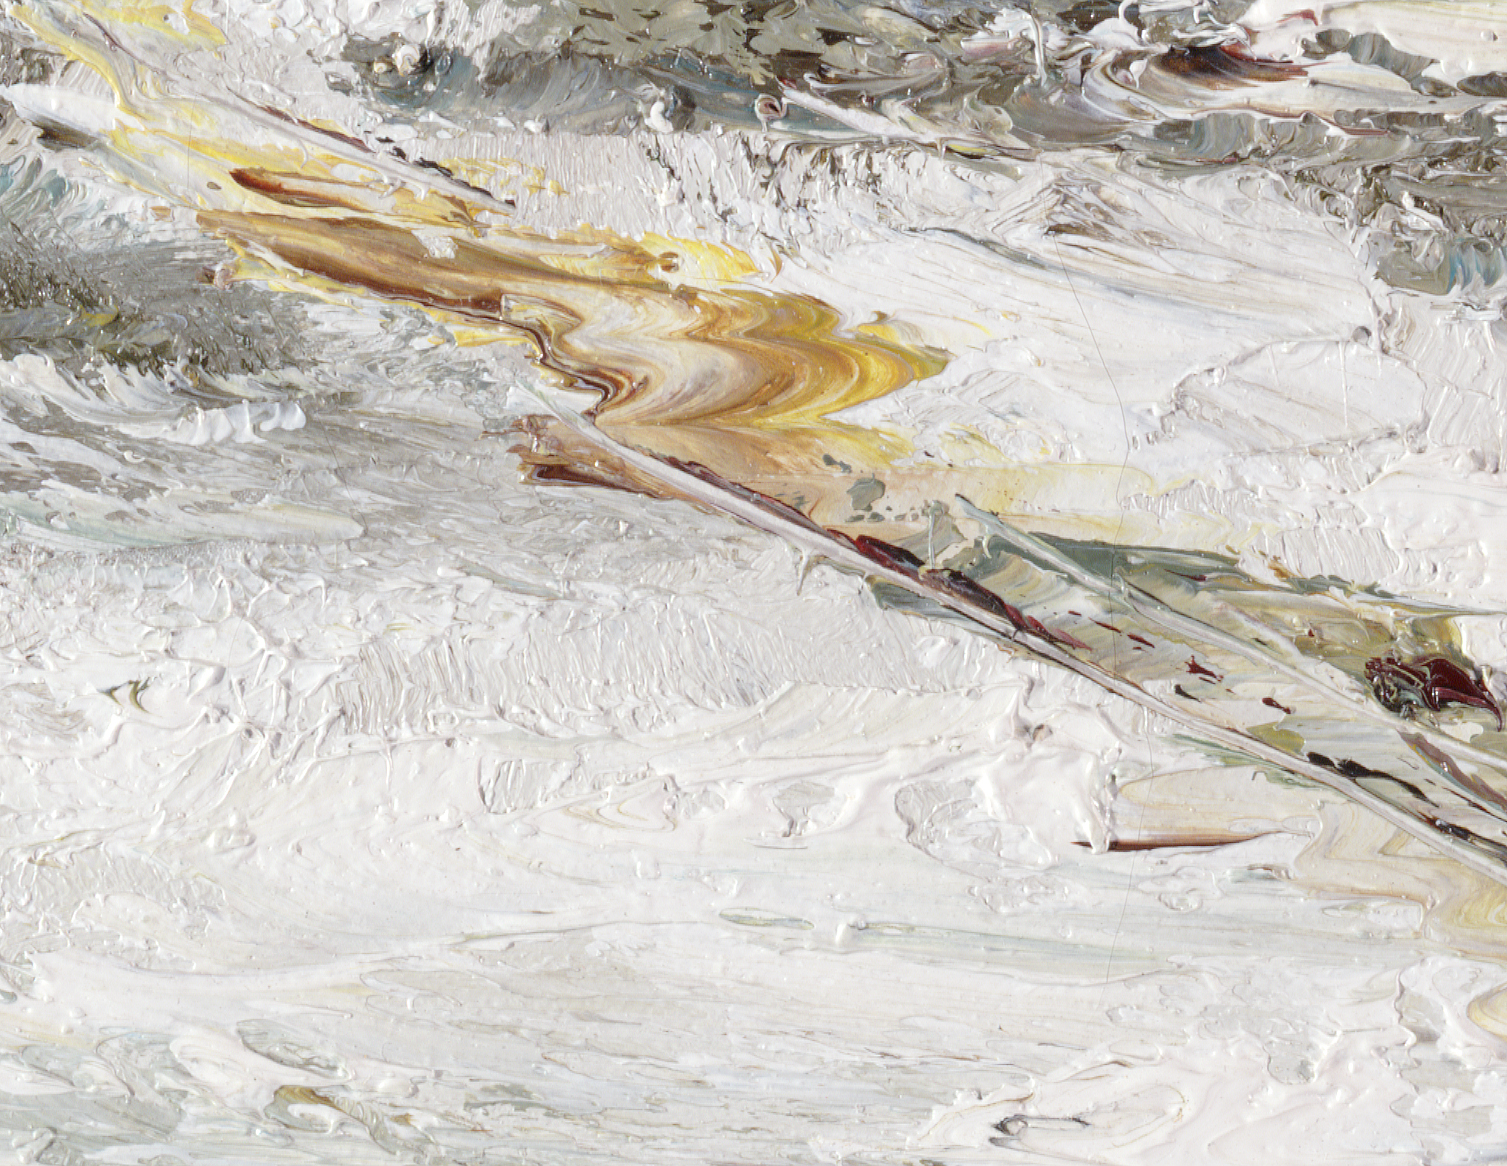
Traditional fine art reproduction standards use lights mounted at a 45 degree angle from the baseboard, generally a high-intensity light aimed so that the work on the board is lit as evenly as possible.  Whether the light is a studio strobe, an HID (high intensity discharge) bulb, or a continuous-spectrum florescent, the light source, including the reflector and diffusers (if used), is relatively small, compared to the work.  Here’s what it will typically look like:

You’re essentially lighting the painting from two sides, evenly.  This creates a shadow on both sides of any part of the painting that has any depth- generally brush strokes.  It’s a basic principle of studio lighting…  for every light source you add, you’re adding another shadow.  Here’s what a detail of that type of lighting produces:

(Capture with Betterlight S8K2)

The impression of the image is that the brush strokes are confused- they’re hard to read, and hard to gauge the depth and direction of each stroke.  The contrast is relatively high, and the color saturation is also high, something we’ll go into later, but primarily due to the small diameter of the light source relative to the textures being lit.

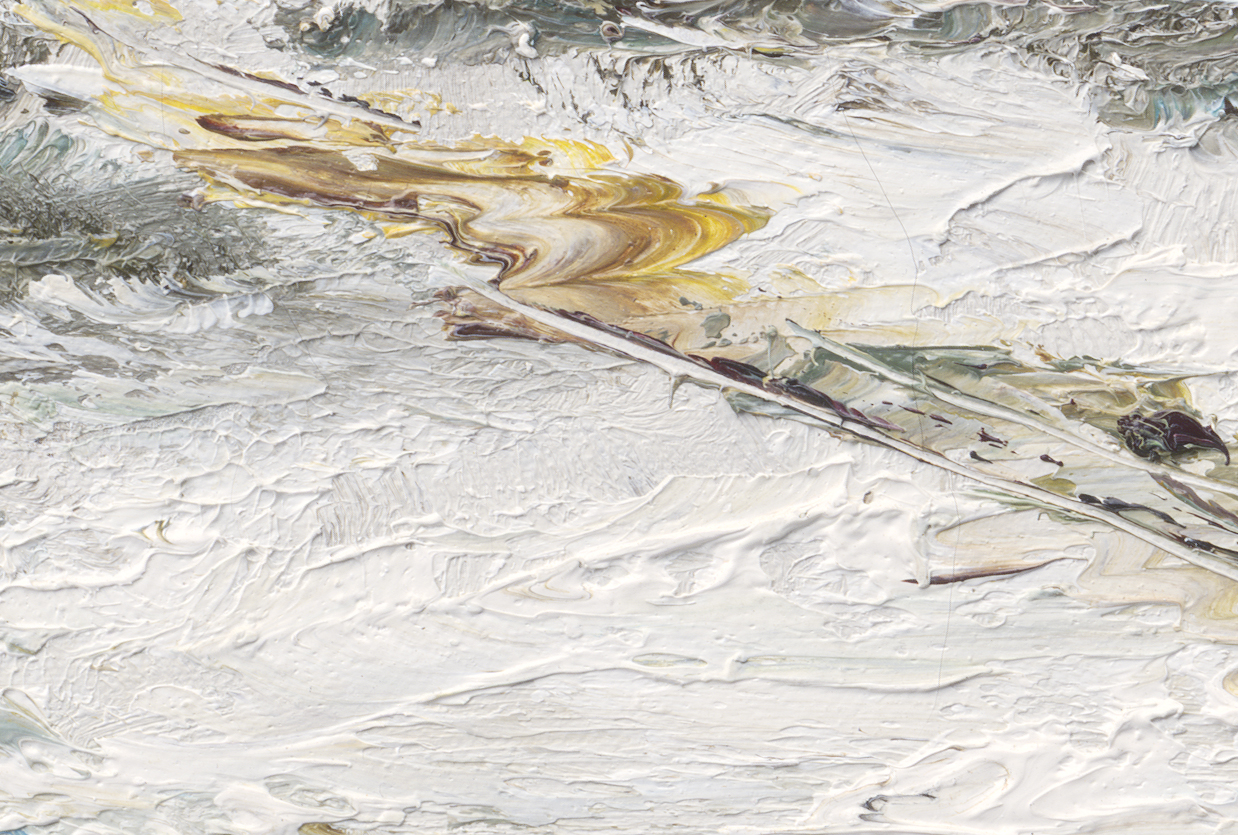
When viewing the painting, almost any gallery, museum or other display will have quartz down-spots lighting the piece.  A typical museum will have a combination of soft ceiling-wide lights in a mock-skylight and quartz or HID downspots trained on the painting.  This gives you a significantly different sense of the work, since each brush stroke is lit from the top, with a shadow below it.  It’s easy to read, it is clear what the depth and texture of the painting has, and it contributes to an good interpretation of what the artist intended.  Using similar lighting, we can reproduce that painting with the same feel of a museum viewing experience.  Here’s an example of that:

 (Capture with Cruse Synchron CS220-110, L Textured lighting)

This is a significantly different interpretation of the painting.  First, the surface of the painting has modeling.  We can see where the top and bottom of a stroke is, and we can literally feel the depth of the paint on the canvas.  Second, the contrast and color are significantly more subtle, largely due to the relative size of the light source on the Cruse camera.  The Cruse uses a bank of daylight-balanced florescent lights, which produce a relatively soft, diffuse, but perfectly even and directional light source.

The result is a viewing experience that’s far closer to viewing the actual painting in a carefully lit environment.  There is simply no case where you will see any painting lit in the standard copy-reproduction lighting formula-  from both sides by harsh, direct lighting.  This traditional wisdom dictating fine art lighting is simply wrong.  It’s a completely artificial method of lighting artwork, devised from a technical standpoint of lighting work evenly within the limitations of the tools which were available, but not at all considering the experiential considerations of the reproduction process.

That is, traditional fine-art lighting completely ignores how the photographic process will change the viewers experience of the subject.

This can be taken one step further.  Consider the light under which the artist created the work.

Historically, painters worked in what’s known as the “North-light studio”, or, a studio lit primarily by a bank of large windows on the North wall of the studio and a north-facing skylight.  Since this prevents direct sun from entering the studio it yields a large, soft, even light source, relatively consistent throughout the day, and was by far the most common environment for painters even well into the mid-20th century.  This is even true for landscape painters, who would typically make their research sketches in the field, then return to their studios to create the final painting.

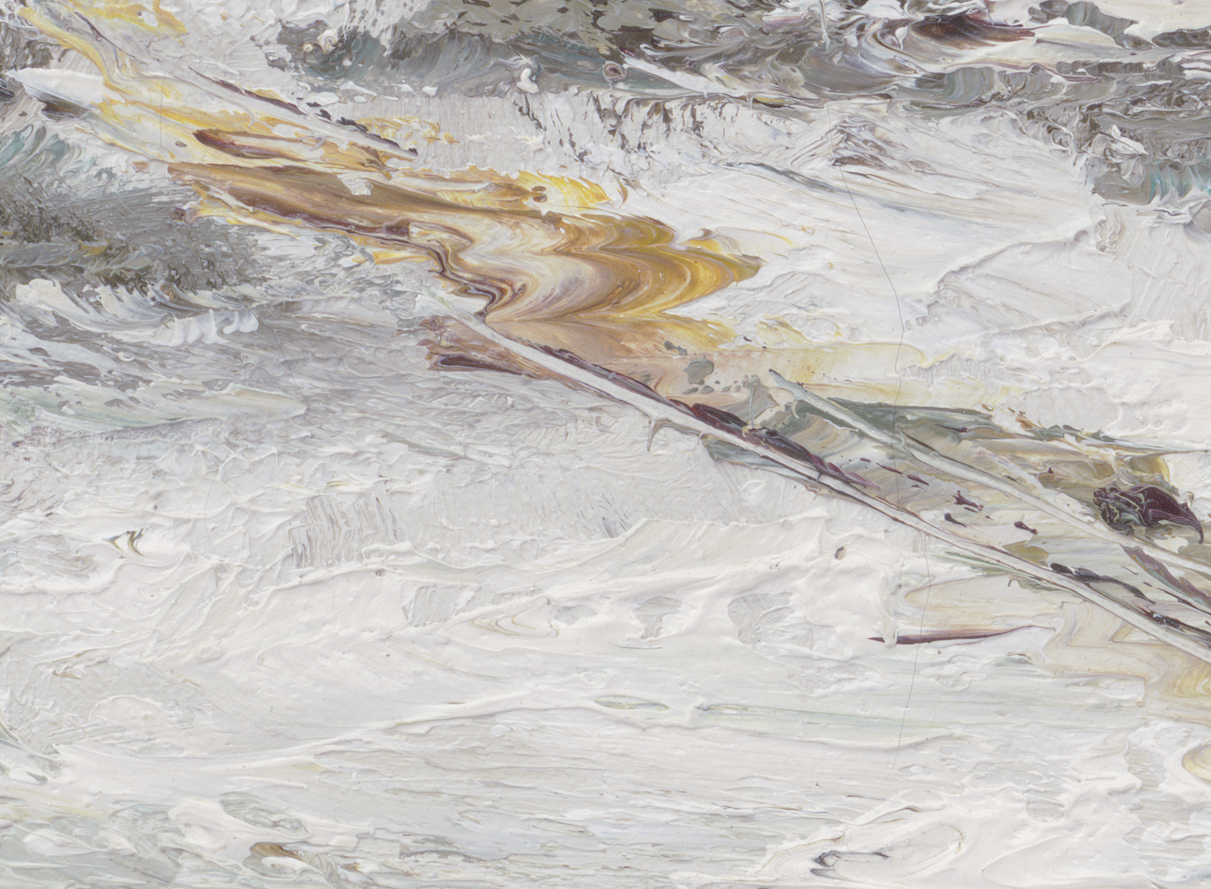
This large, soft and predominantly “cool” light source gave a significantly different impression to a painting than what we’re familiar with.  Here’s a simulation of what that would look like, captured with the Cruse camera with the softest lighting possible:

(Capture with Cruse Synchron CS220-110- LR even lighting)

This is probably what the artist saw when creating the painting…  or as near as we can recreate it in a fine-art reproduction environment.  It’s a significantly different experience, and it’s entirely due to the lighting used to capture the work.

Using the Cruse system to reproduce art work is far more than a simple, traditional copy/repro technique.  Because it gives such complete control over the quality of lighting, creating faithful reproductions of original art is much more than a reprographic process.

It’s a photographic process.

-Ted Dillard

October 21, 2011

Tech Tips: Epson Advance BW Grayed Out? (Photoshop CS5)

Filed under: Uncategorized — Tags: , , , , — admin @ 4:12 pm

Having trouble printing with Epson’s Advanced Black and White driver with CS5?  There’s been a very tiny change in the driver that may just drive you crazy, it’s back under the “Color Matching” pulldown.  Take a look:

Starting with the normal process of selecting “Printer Manages Color” in the Photoshop “Print” dialog, you then go to “Print Settings”.  Along with the standard selections we all know and love, you need to go to this menu- “Color Settings”.  This used to default to whatever you’d selected in the Photoshop “Print” dialog, that is, if you asked for “Printer Manages Color” it would automatically select “Printer Color Controls” and gray out  the “ColorSync” selection.  No more.

Here’s what you get:

Now you have to go in and select “Epson Color Controls” to activate the Advanced Black and White options.

And…  as my buddy John from across the pond is fond of saying, “Bob’s your uncle!”

A big thanks to Derrick Feole for the heads-up!

October 18, 2011

Artist Profile: Huguette Despault May

Filed under: Uncategorized — admin @ 9:44 am


We had a great chance to have a visit with Huguette May, and talk to her about her work. Have a listen:

Visit Huguette at here site, www.huguettemay.com.

Powered by WordPress