(…to be used only for Good, never for Evil!)
I’m a big proponent of Layers and Masks- as I often repeat in my books and classes, it’s a simple tool that, once mastered, can be used for almost anything you need to do in Photoshop. I use them constantly in my Smart Object RAW workflow, but here’s an interesting example of how they can be used to apply a massive edit to selected areas in a very short amount of time.
We had a job in a while back that required the “smoothing” of almost every area of color. The artist, once he saw what we could do with the solid areas of color he used, decided to ask us to recreate the entire work as a new style- almost duplicating the effect of a serigraph, with solid planes of pure color. We did feel, however, that some feel for the brush stroke had to be kept. It was a delicate balance.
Not only that, but, as you can imagine, the first pieces we did took an astounding amount of time to retouch- in the neighborhood of sx hours per piece. We had to develop a method to work more efficiently.
Enter: Layers and Masks, combined with the Dust and Scratches filter.
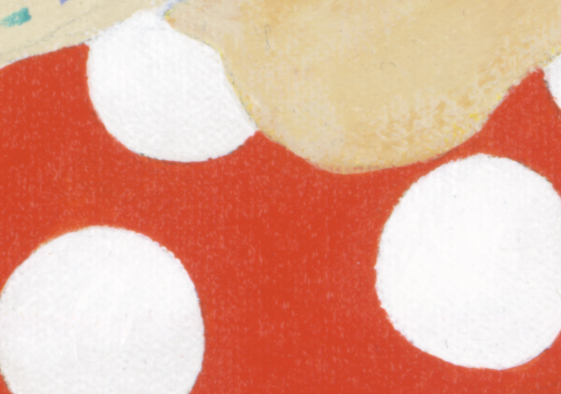
Here’s what the pieces looked like, right out of the Cruse scanner.
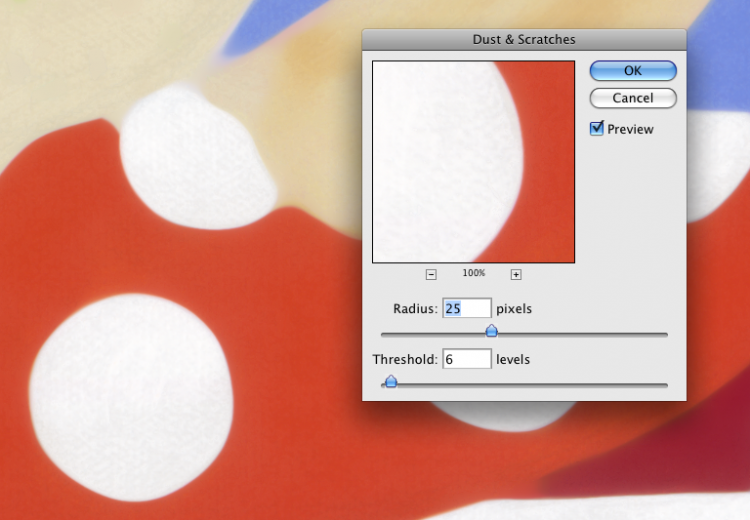
You can see the blotches and brush marks the artist was objecting to. Our first step was to apply the Dust and Scratch filter to a duplicate layer- like this:
You get there like this- Filter>Noise>Dust and Scratches.
As you can see, this created some problems along many of the borders of the color fields. Here’s where we used a mask on the layer to control where, and how much of the effect we were going to apply.
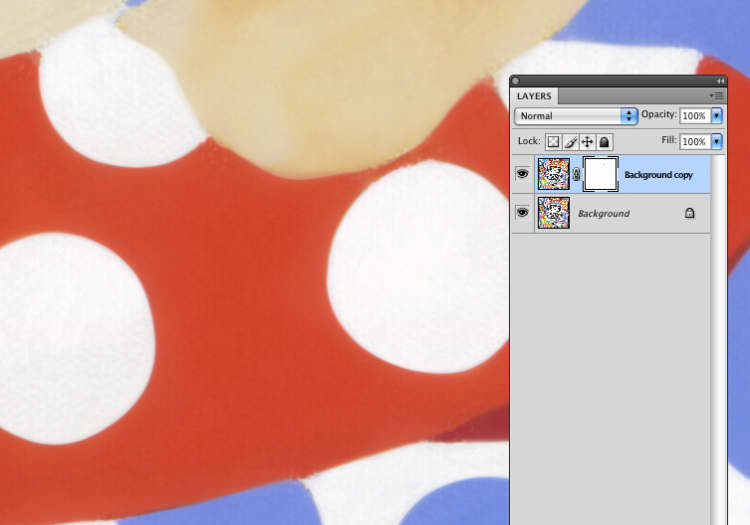
Selecting the Dust and Scratches layer, you click the Mask icon and get a new, clear mask. I like to use the Brush tool, set to black, with an Opacity and Flow of 50% each… I then simply paint on the mask over the areas that I want to become opaque. Remember- white is transparent, black is opaque.
Here’s what we get:
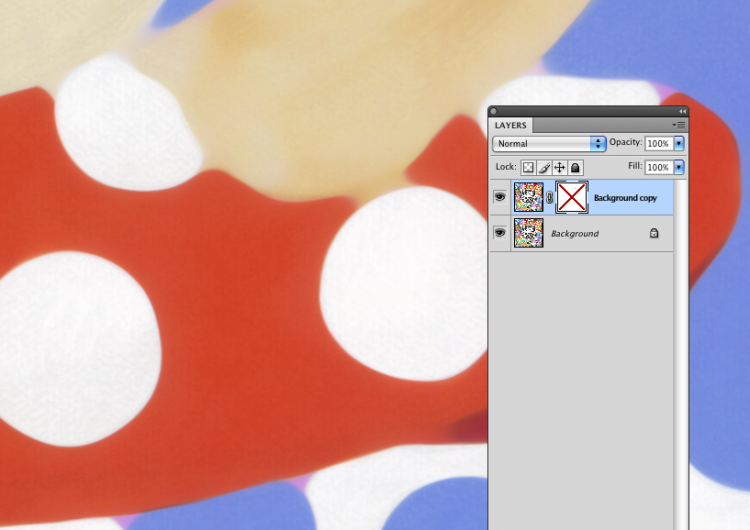
Just for the sake of comparison, here’s the same thing, with the mask turned off:
The process, after going through each area of the print and touching the edges, the details, and some of the fields, took around 2 hours per image for a 40″ x 40″ square painting… yielding around 4 hours of time saved, and a better quality result.
As in most of Photoshop, there are about six ways to accomplish anything… much of the challenge in using the program is to find the best way to attempt a new task. I’ve found, time and time again, I always come back to the basic Layers and Masks, and it hasn’t let me down yet!


