ParrotTalk

July 28, 2010

Pixels, Rasters and Vectors…

Filed under: Support — admin @ 1:12 pm

…or, “what the heck is a RIP, anyway?”

It’s easy enough to simply explain that a RIP stands for “Raster Image Processor” but that really doesn’t tell you too much- either about what a RIP does, or why you need it.  To understand that, you need to get a grasp on the two basic kinds of image files- raster images and vector images.

A raster image is kind of easy- think of a map.  Raster images are made up of pixels with actual physical locations- you know how when you’re looking for a street on a map, and the street index says it’s at C-4?  You go to column C, and down to row 4, and you see the street.  Raster images are the same deal- every bit of the image is mapped out on a grid of squares.  Say you have an image that’s 2500 pixels wide by 1500 pixels high.  You have a total of 3,750,000 pixels in your image, and every pixel has a location.  It’s called a “bitmap” file sometimes, too- literally a map of the bits of information laid out in two dimensions.


The thing about a raster image is that, in defining the map of the image, you’re also defining the size.  The bigger the image, the bigger the file…  you also are limited by how much you can size the image up or down, since you need to re-sample the pixels to get more, or less of them.  After a point, you’re image is going to start looking bad.

Now, imagine that you’re trying to describe a square.  You could say something like this…  “Start here.  Go North, 30 feet.  Turn East, go 30 feet.  Turn South, go another 30 feet.  Turn West and walk another 30 feet- you’ll be back where you started.”  You’ve just described a square using absolute dimensions, and mapped an area.  In effect, you’ve made a raster image of a square.

Try this.  Instead of using “feet”, use generic “units” as a describer.  Let’s say, you start by saying, go North 30 units, East 30 units, South 30 units and West 30 units.  You’ve now described a shape, rather than a volume.  Simply by changing the units you’re changing the size of the shape.  I can describe a square that’s a few inches, or a few miles in size. 
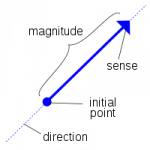
The cool thing about a vector description is that it describes a shape really well…  like line art, an illustration, or a typeface.  Whenever you have something that needs a simple solid fill, an outline, essentially, it works great.  Naturally, it’s not so good at describing what’s inside those shapes, so if you need that kind of information you need a raster image.  A vector file has a ton of information, though, and is virtually unlimited in how much it can be scaled.  
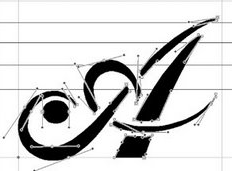
The trick is in turning either of these into something that the printer can make sense of.

A file, like a raster file, that maps out colors for every square of the image translates pretty easily into information that a printer can handle…  a printer wants to know what ink, and how much, to put where.  The only trick is converting the RGB of a image pixel into the CMYK of a printer’s inks- a process called “dithering”.  It’s a little more difficult translating vector information into a file the printer can use- and that’s the function of a RIP. 
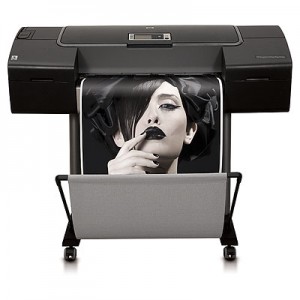
The RIP takes your vector files out of Illustrator, Quark, InDesign or other so-called “Postscript” applications and rasterizes it.  That is, it takes the vector information- the shapes- and figures the sizes.  It then plots out the pixels so the printer can process the “map” of the image.

A RIP can be a piece of hardware, software running on a workstation or server, or, as in the case of most larger office laser printers, can be built into the printer itself.  Interestingly, this is one of the things that sets the HP wide-format inkjet printers apart from the rest of the field- nobody else has an onboard RIP like the Z series “ps” printers.

There are a few other things that a RIP can do, workflow management being a biggie.  Built into the RIP is a queue system- the RIP stores and organizes the jobs as they come in.  This is a great side-benefit in a high-output print environment.  When you have several users sending files, the RIP allows the printer to hold and queue the jobs as they come in.  You can also pull jobs that have been printed and send them to the top of the list- making reprints without having to re-open and re-send the file.

It’s just one of the reasons we love our HP Z3200…  and recommend them for anyone who’s in a multi-user environment or has to work with illustration or layout programs…  workflow management, and seamless integration of Raster Image Processing.

-Ted Dillard

The Power of Layers and Masks…

Filed under: Uncategorized — admin @ 10:23 am

(…to be used only for Good, never for Evil!)

I’m a big proponent of Layers and Masks- as I often repeat in my books and classes, it’s a simple tool that, once mastered, can be used for almost anything you need to do in Photoshop.  I use them constantly in my Smart Object RAW workflow, but here’s an interesting example of how they can be used to apply a massive edit to selected areas in a very short amount of time.

We had a job in a while back that required the “smoothing” of almost every area of color.  The artist, once he saw what we could do with the solid areas of color he used, decided to ask us to recreate the entire work as a new style- almost duplicating the effect of a serigraph, with solid planes of pure color.  We did feel, however, that some feel for the brush stroke had to be kept.  It was a delicate balance.

Not only that, but, as you can imagine, the first pieces we did took an astounding amount of time to retouch- in the neighborhood of sx hours per piece.  We had to develop a method to work more efficiently.

Enter: Layers and Masks, combined with the Dust and Scratches filter.

Here’s what the pieces looked like, right out of the Cruse scanner.

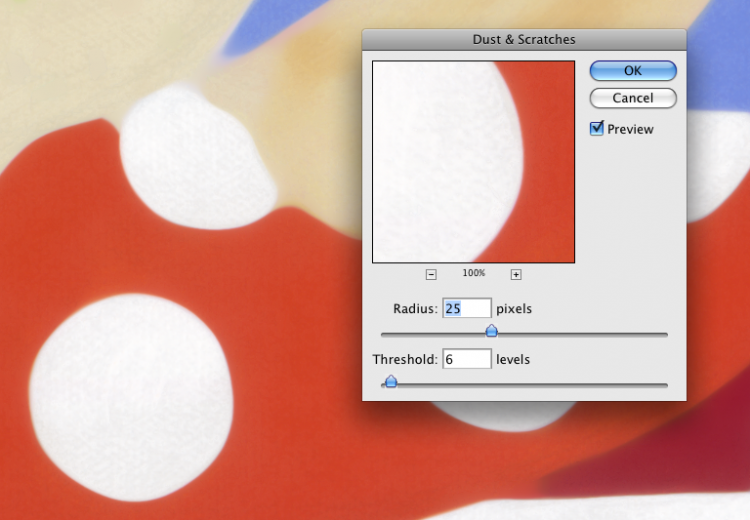
You can see the blotches and brush marks the artist was objecting to.  Our first step was to apply the Dust and Scratch filter to a duplicate layer- like this:

You get there like this- Filter>Noise>Dust and Scratches.

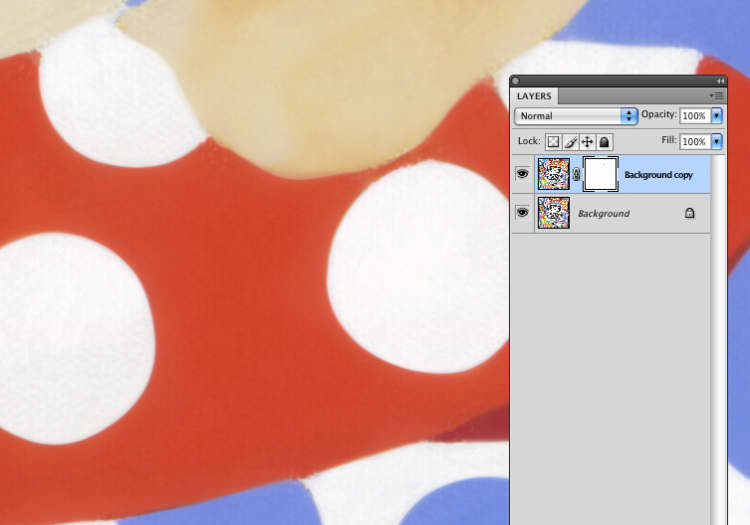
As you can see, this created some problems along many of the borders of the color fields.  Here’s where we used a mask on the layer to control where, and how much of the effect we were going to apply.

Selecting the Dust and Scratches layer, you click the Mask icon and get a new, clear mask.  I like to use the Brush tool, set to black, with an Opacity and Flow of 50% each…  I then simply paint on the mask over the areas that I want to become opaque.  Remember- white is transparent, black is opaque.

Here’s what we get:

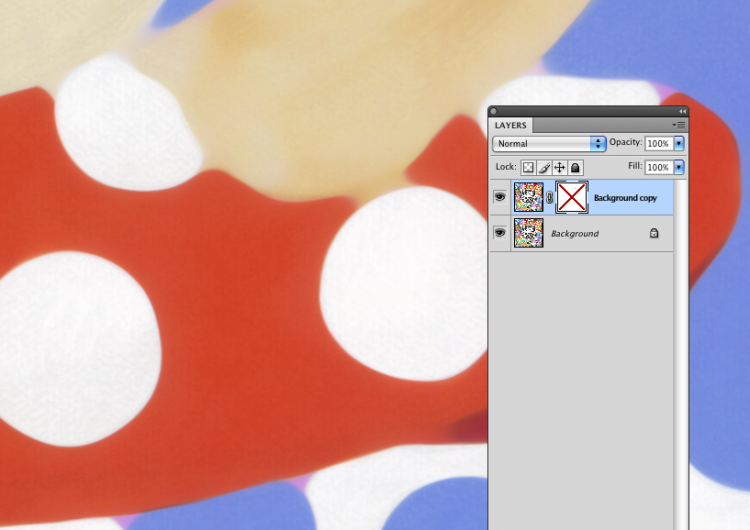
Just for the sake of comparison, here’s the same thing, with the mask turned off:

The process, after going through each area of the print and touching the edges, the details, and some of the fields, took around 2 hours per image for a 40″ x 40″ square painting…  yielding around 4 hours of time saved, and a better quality result.

As in most of Photoshop, there are about six ways to accomplish anything…  much of the challenge in using the program is to find the best way to attempt a new task.  I’ve found, time and time again, I always come back to the basic Layers and Masks, and it hasn’t let me down yet!

-Ted Dillard

July 23, 2010

Fluid-Mount Scans- Why We Use It, Why You Need It

Filed under: Uncategorized — admin @ 11:15 am

With the advent of desktop film scanners back in the mid-’90s a lot of photographers took on the task of scanning their own film instead of outsourcing the job to a drum scanning service. The scans coming from these scanners were quite serviceable for web work and some limited print- mostly small, short-run inkjet- purposes. As low-end flat-bed scanners improve, many studio and small lab based systems have improved to the point of almost replacing the fluid-mount drum scan.

Almost.

There are a few things about fluid mounting that simply take you head-and-shoulders above what you can get without it.  Probably most importantly, as a general rule any scanner that supports fluid mounting properly is starting off with an ultra-high resolution system, and an ultra-high DMax (or density) capability.  Even without fluid mount, you’re using better hardware.  It should be better- the cost is in the tens-of-thousands of dollars for these systems, and, as always in imaging technology, “…you get what you pay for.” has never been a truer statement.

One of the interesting things that happens when you use a fluid-mount system is that the film’s density becomes more readable by any scanner.  Back when flatbed scanners were starting to become serious tools, more than a few people I know started using drum-scanning fluid (then, basically straight mineral oil) on their flatbed scanners…  they got a vast improvement in the apparent DMax.  A few of them also destroyed their scanners with oil dripping into the guts…  ultimately a pretty expensive “hack”.

One of the most significant reasons we use fluid, however, centers around the actual physical condition and properties of the film itself.

There are a few things you’re wrestling with when you use a scanner for film.  The first issue centers around the surfaces where the film touches the glass platen.  Every surface you add to the equation introduced the possibility of dust and scratches- things that will be picked up by the scanner.  You also have to worry about Newton rings- a natural phenomenon that happens whenever two glossy surfaces come in contact, resulting in a prism effect in concentric circles.  The common method to overcome this is to use an “anti-Newton” glass- a method that also softens the scan slightly.  Using a fluid-mount system eliminates virtually all of these problems.  The fluid prevents the formation of Newton rings.  It also literally fills in scratches and surface imperfections.  If dust is present, it will, of course, scan- but there’s a significant amount less dust with fluid because there’s no static attracting it to the surface of the film or the glass.

Most film brought to us is not particularly, well, recent.  Often we’re scanning film that’s been in an archive, most of it thankfully has been stored properly and is in pretty good shape.  Some of it, however, may have started out in the notorious “shoebox” filing system we’ve all been guilty of, and even film coming directly from the lab has a decent chance of having small scratches and embedded dust present.  When you’re scanning at a true optical resolution of 5000 dpi and higher, you’re going to see it.

Just for example, here is a scan we did on our iQsmart of a transparency without fluid mounting.  (The visible Guide is there in Photoshop so we could locate the spot accurately, and we’re viewing this from a 2500dpi scan at 100%.)

In particular, note the small scratch on the right-hand side of the selection.  Now look at what you get with a fluid mount:

Same area, we literally just fluid-mounted the chrome without moving it.

As you can see, and everything else aside, fluid mounting saves you an enormous pile of time when you’re retouching flaws in the image, preparing it for printing.  The older, more abused, dirty or damaged a piece of film is, the more you need to use fluid mounting.  On a chrome in good condition, though, you often eliminate the need to do any spotting entirely.

Fluid mounting started out using mineral oil- it was relatively easy to clean off the film after the scan, though the common practice was still to re-wash the film to remove any residue.  Today we’re using fluids that are much safer for the film.  They’re more volatile- they evaporate quickly, and don’t leave reside- as well as being less corrosive to delicate emulsions.  For example, our LUMINA Optical Super Scanning Fluids are what we prefer for the safest handling of the film, and fast, easy cleanup.

Hasselblad continues to produce the Flexframe scanners using what they call “Virtual Drum” scanning technology.  This uses no glass- the film is held in a frame that is tracked in a slight arc as it scans, allowing the lens to focus precisely at the film plane without introducing glass surfaces and associated dust and Newton rings.  They use the highest level of optics and sensors giving you some of the highest density and resolution- and it’s a great idea from an engineering standpoint.  But…  because you’re not using fluid, you’re stuck with all the surface imperfections on the material.  Not so great from a retouching standpoint.

You’re also seeing some offerings of mid- to low-priced scanners with added fluid mount capabilities.  Unfortunately, they’re not really built for fluid, more sort-of adapted for fluid, and we’ve seen and heard of a few getting damaged by leaking oil…  in addition, they’re starting out with less than optimum hardware, generally in the optics.  In this price point be very wary of specification claims, in particular for resolution.  In some specific cases, you have low-end optics, but with very high optical resolution.  Unfortunately, sheer resolution isn’t the last word in lens design- contrast and clarity play a big role, and that kind of performance costs money. You simply can’t compare the scans from a $700 scanner to those of scanners costing over $20,000- period.

In the final analysis, we’re back to the beginning of the story.  The desktop scanners are great for what they’re meant to do, but, as with so many things, if you’re starting with a better scan using the right methods, you’re going to end up with a better print- after a lot less work.

July 15, 2010

Project Diary- Scanning Pinball with the Cruse

Filed under: Uncategorized — admin @ 10:11 am

We get a lot of interesting projects in, here’s a cool one- Jim Heck, of Classic Playfield Reproductions brings in a vintage pinball table for us to scan!

July 14, 2010

The Display Question Redux: What Display Should I Buy?

With the release of the Eizo CG245W self-calibrating display, the photo/printing forums are buzzing anew on what is probably the most often-posted question online: “What display is the best one for me?”  Well, for me the answer is, “It depends…”

The way I usually talk about displays is with my music analogy.  If you have a nice home audio system and you like listening to Classical music, you buy speakers that can faithfully reproduce that sound.  If you like to listen to a cello, you’ve got to have a system that can reproduce that “cello sound”.  If you have speakers that can’t make that sound, you’re not going to hear it (no matter how good the rest of the system is…).  Likewise, if you need to work on colors that your display can’t show, then you’re literally working blind.

Point #2 is calibration.  The oft-asked question is, “…how do I know that what I see on my display is what my client sees?”  Simply, you don’t.  However, if you have a good display that is calibrated to the industry standard (Gamma- 2.2, White Point- 6500K, Luminance- 180) and your client does too, then you’re going to be seeing essentially the same thing.  Calibration is absolutely critical to this working effectively.

Finally, there’s personal, well, comfort, for lack of a better word.  A friend said to me once, a very long time ago: “Look.  The monitor is the one thing that’s in your face every day, for most of the day.  Put your money into the display.  Period.”  I have to say, that was some of the best advice I got, and I still swear by it.  The one thing is the size/color tradeoff, though.  I love a big display- the Apple 30″ Cinema is possibly my most favorite workhorse- simply because it’s huge.  Big displays let you work faster.  It’s a fact.  But I like a more color-accurate display too, like the Eizo or Lacie, or the NEC graphics series…  so it’s a tough call.  For the same money I can get a smaller, extremely accurate display or a big, “decent” display like the Cinema.

Our buddy David Saffir has a great post on his blog about the new “Wide Gamut” displays- check it out via davidsaffir.wordpress.com. He’s writing from a photographer’s perspective, but anyone printing digitally can pick up some good information there.  David also does some great printmaking-oriented workshops as well, specifically dealing with the importance of Color Management- display calibration and printer profiling-  one of which was the HP DreamColor II Workshop we hosted here at Parrot.

…and yes.  We’re planning the next one real soon!

Powered by WordPress